|
It's time for another before and after. It always brings me such joy to receive the "after" photos from clients. This was a big year for patios. This particular patio is in Michigan where Summers are cherished. This is a return client I have worked with over the years. When Spring was rolling in they contacted me to give their patio a refresh. The mission was to create comfortable seating around the fire while seating more people for outdoor dining. They were also looking for ideas to fill a blank wall on the side of the home. This space came together beautifully. I just wish I lived closer to come over for some smores. Tell me about your space. Is there any area of your home that needs some design help? No project is too big or small for Decorator in a Box. Follow the four easy steps on the website to be on your way to custom design that meets your personal style and budget. Click here to start the process in four easy steps. http://www.mydiab.com/start-decorating.html Xo, Annie After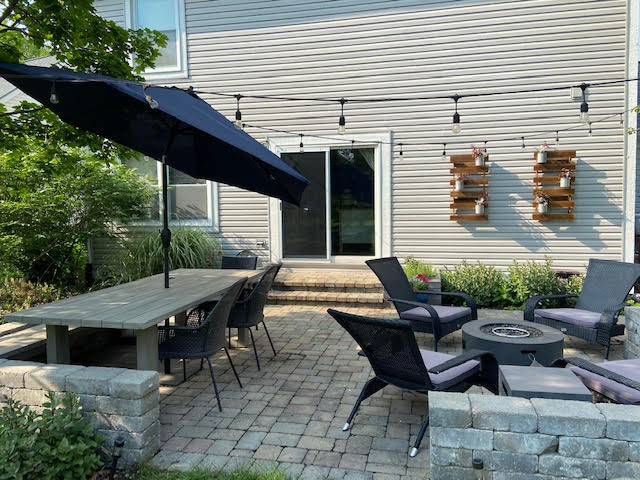 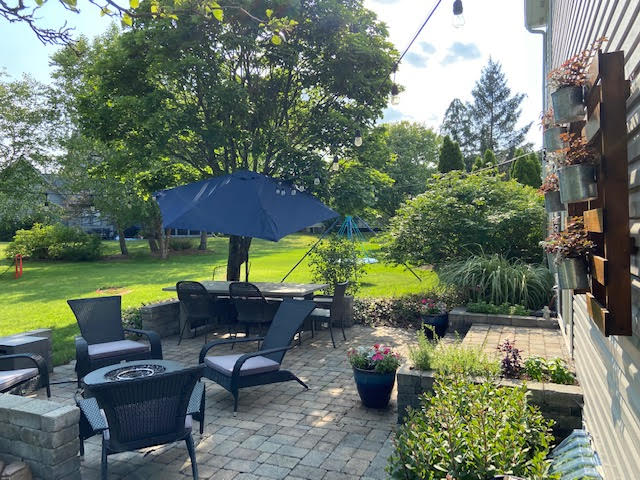 Before 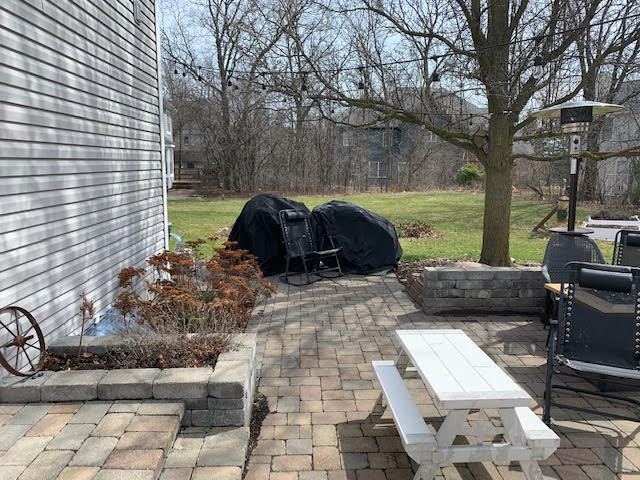 Vision Boards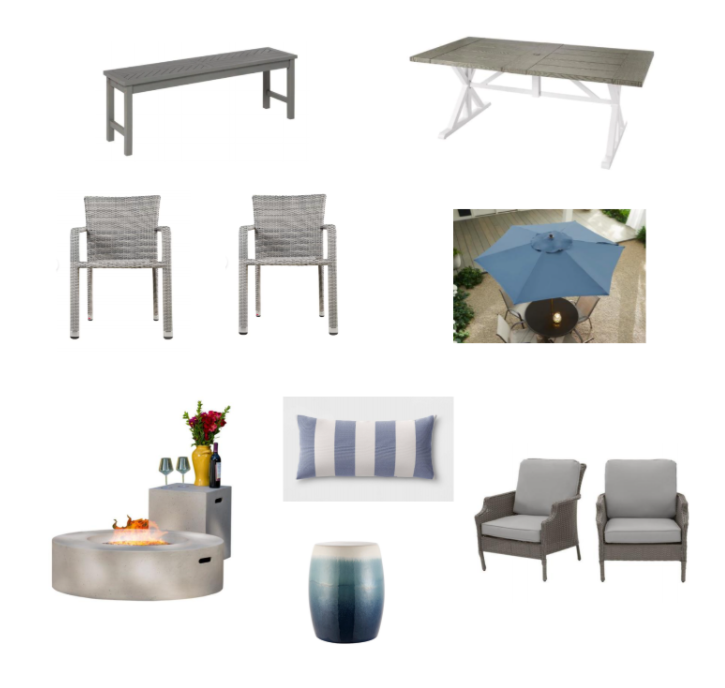 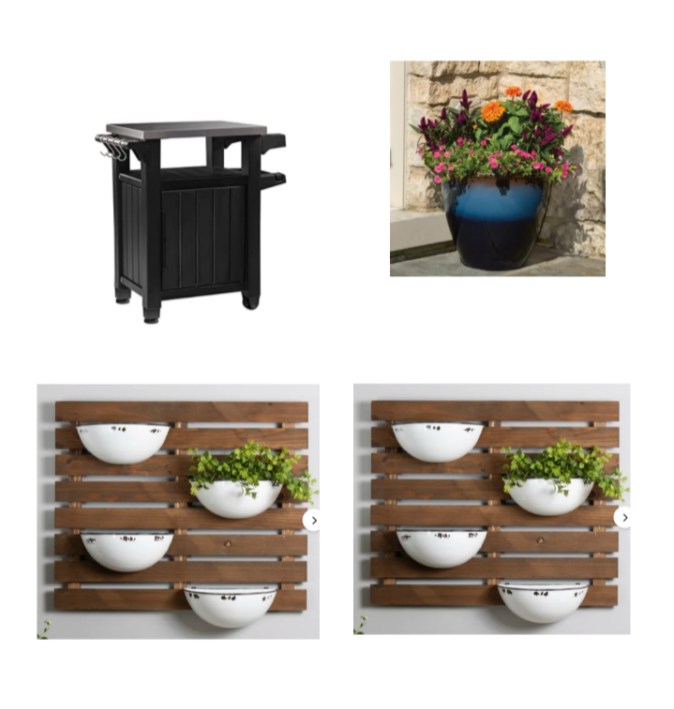 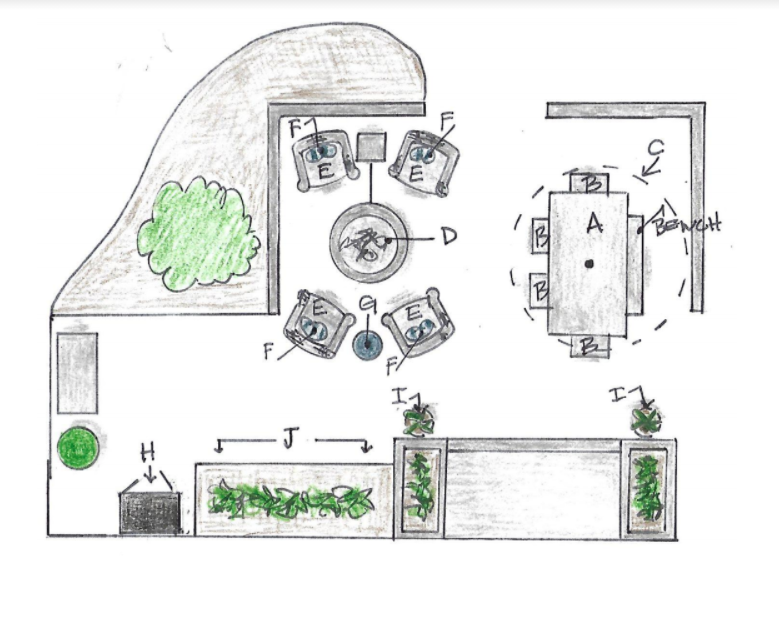
0 Comments
Happy Thursday Friends! I hope you are all gearing up for a fun Fourth weekend. I have been meaning to share this New York City before and after with you for weeks. This family is one of my favorite returning clients. I have worked with them over the years. I have even created designs for two different apartments with them. In NYC the main mission is always to make the most of a small space. Finding furniture pieces that have double uses and storage are always key. This design was created in the midst of the pandemic. This added another layer of accommodating two kids doing e-learning and their school pods. Along with both parents working from home. Weeks back I showed you their outdoor terrace. Today I bring you the updated living room. I love how it came together. My two favorite pieces are the coffee table with storage and the extension dining table. They have multiple functions while not sacrificing style. All and all this space certainly survived and pandemic and is on to brighter days ahead. Before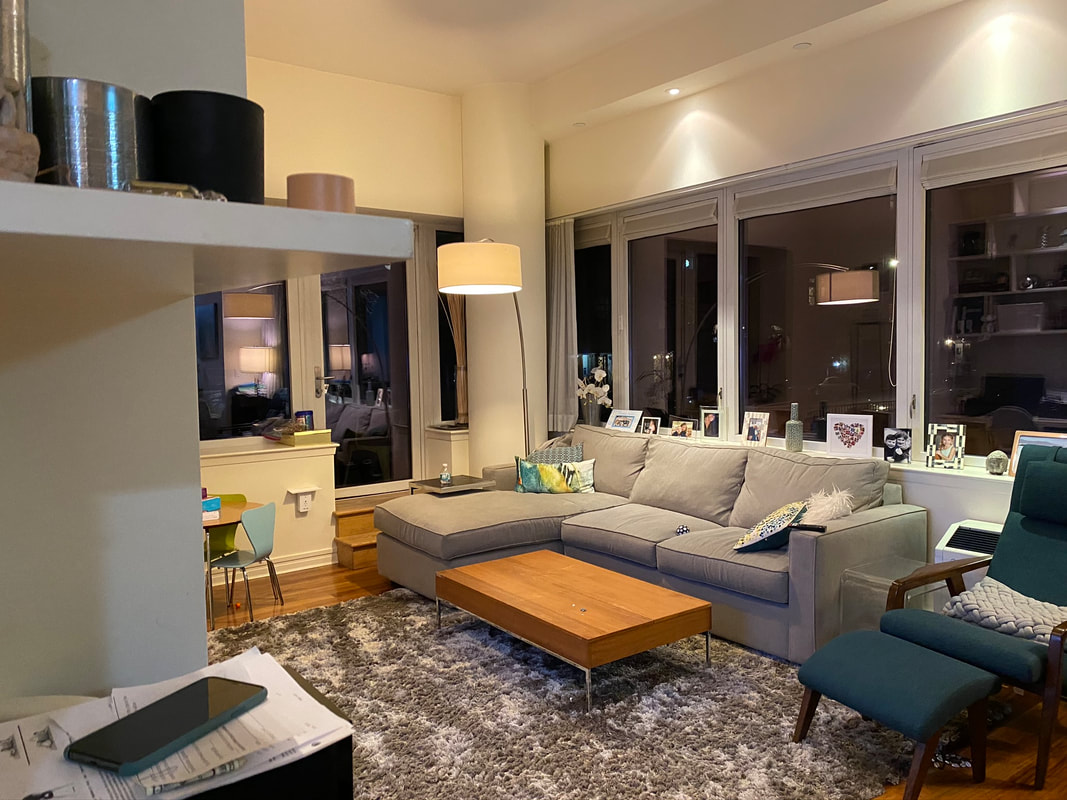 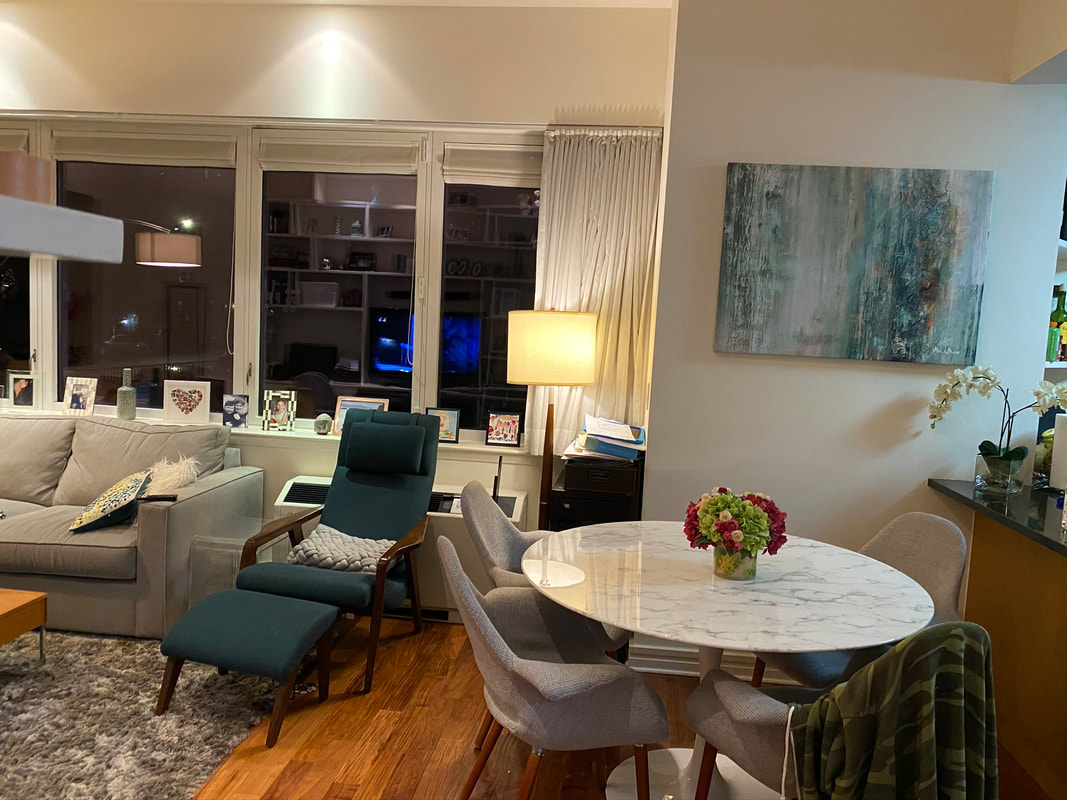 After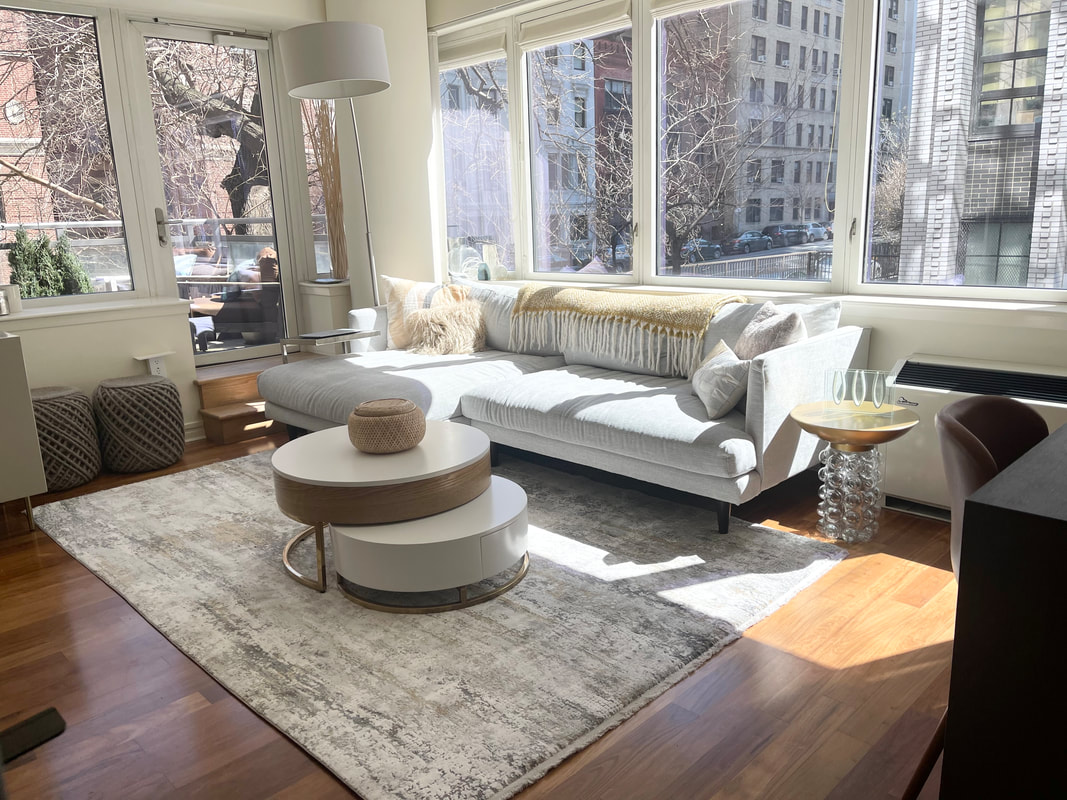 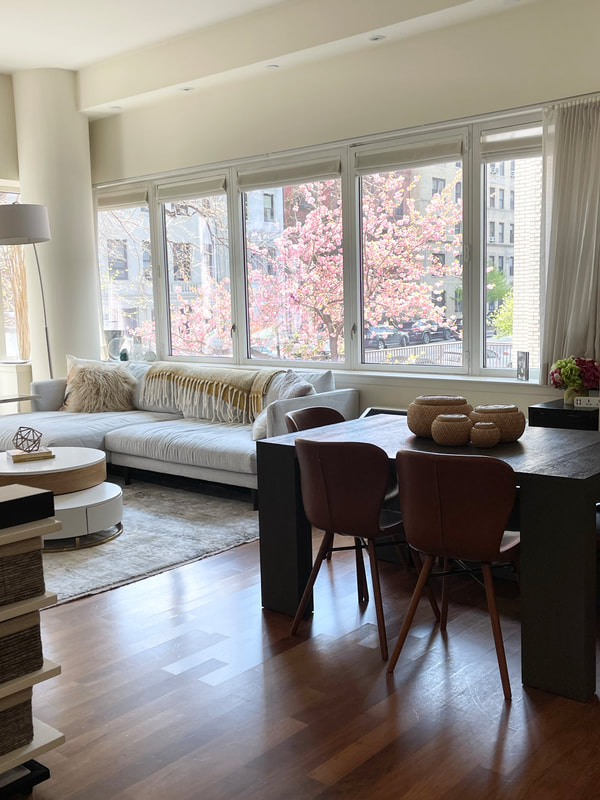 Tell me about your space. Decorator in Box will create a design that meets your personal style, needs and budget. The best part is this can all be done from the comfort of your home computer or device. You can remain in your pajamas and don't you dare worry about cleaning for me. Just follow the four easy steps on the Decorator in a Box website. I can't wait to hear about your project.
Xo, Annie It's Patio season in New York! After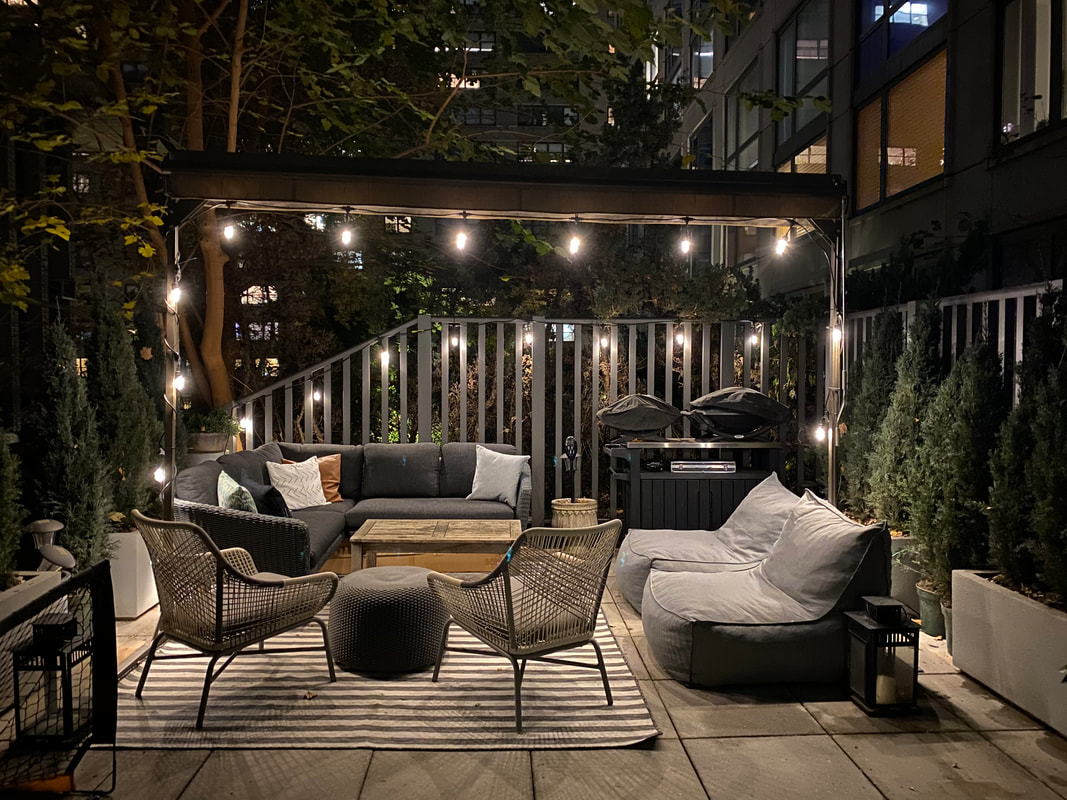 Before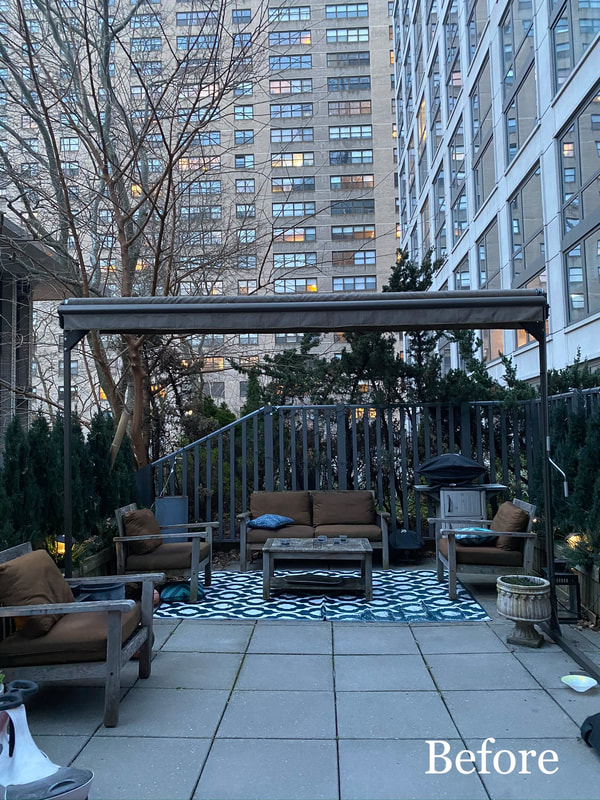 Happy Tuesday! I hope you all are having a great start to your week. I'm thrilled to share this before and after with you. This was a remodel for a boys bathroom. The home is located in the lovely coastal town of Cardiff, California. These brothers love to surf. The photographs you see on the walls are of them and were taken by their Dad. The mission for this bathroom was to give it an updated coastal modern look. Designing something that had a masculine coastal feel with beachy accents was the style inspiration. It also needed to be functional and easy to clean as it will get heavy use. The flat panel white oak cabinets give this space a modern sophisticated look while bringing in that natural beach feel. The light gray blue walls pull in the ocean. The soft gray tiles also give a modern and durable function. This bathroom is ready for use after a long day of catching waves. See the full before and after photos below. Do you have a design project you need help with? Let Decorator in a Box help with a custom online interior design. The entire process is done from the comfort of your home computer. All designs are at an affordable flat rate. I can't wait to hear about your project. Start your design today by clicking here. Xo, Annie 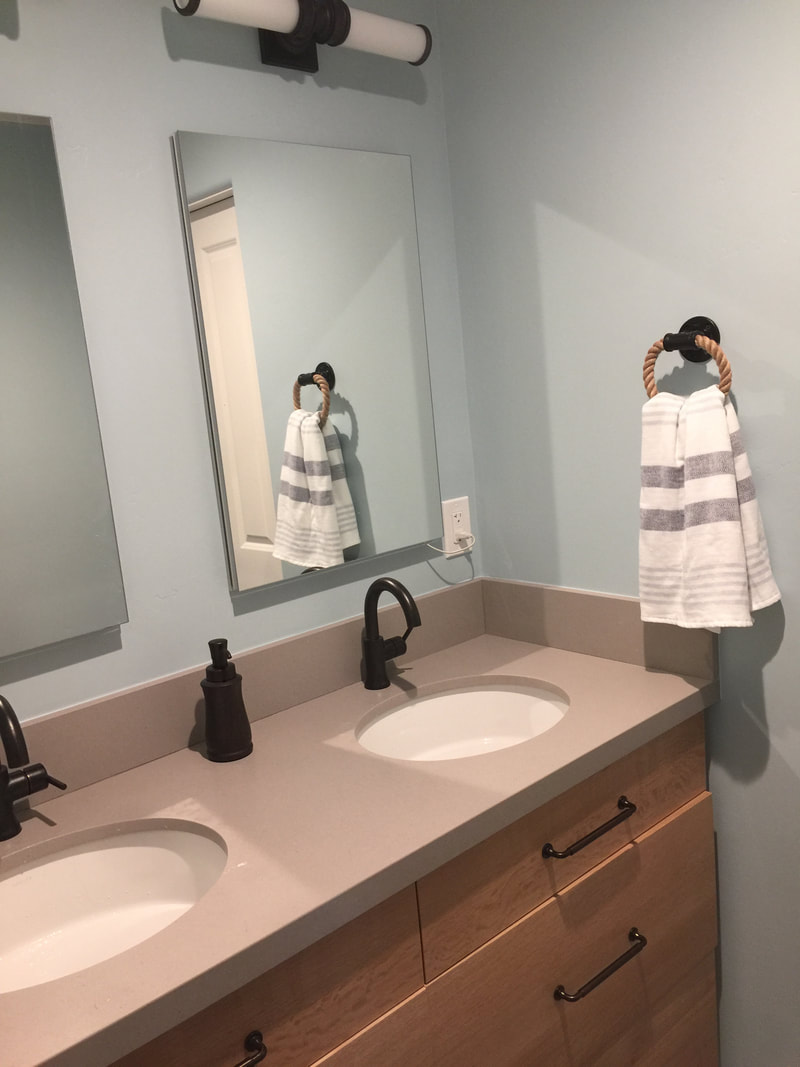 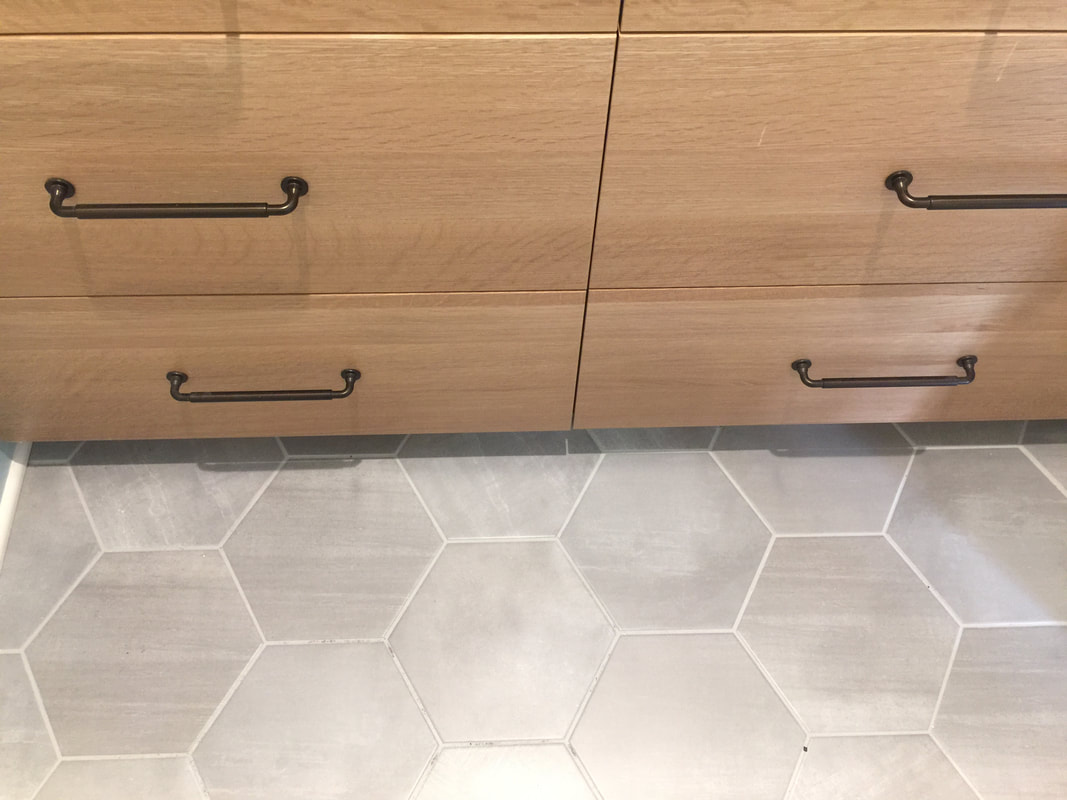 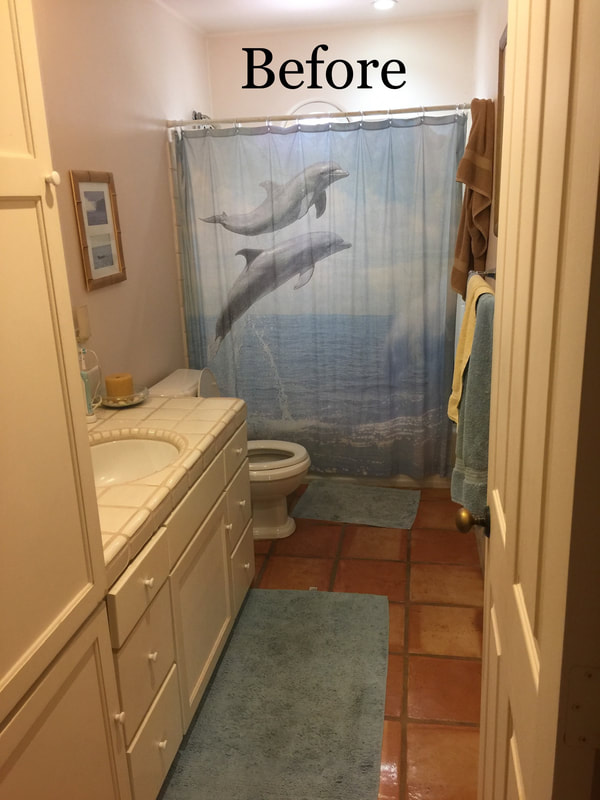 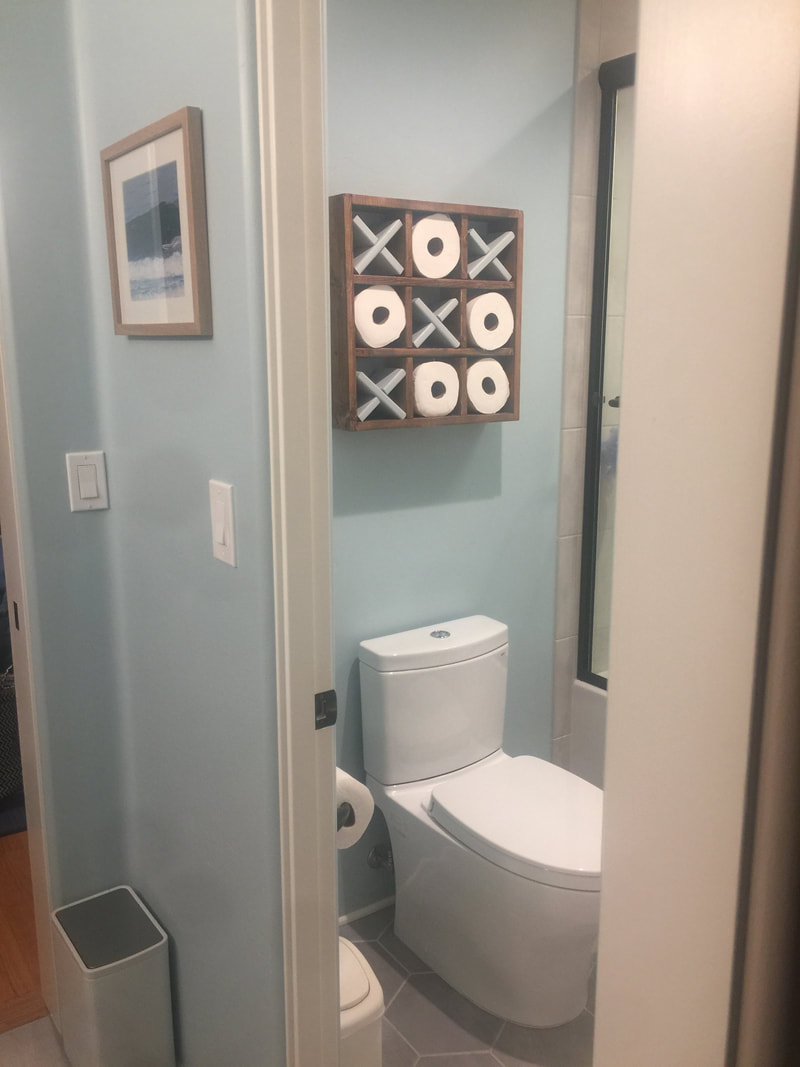 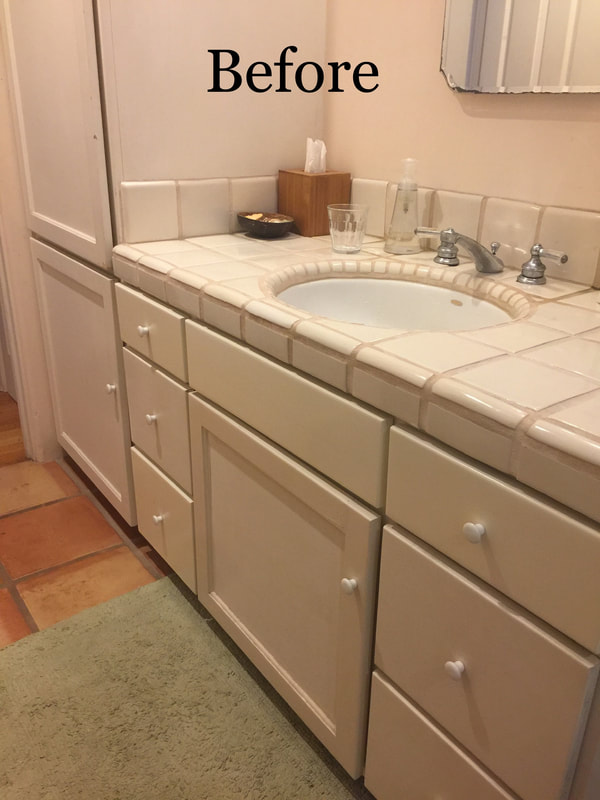 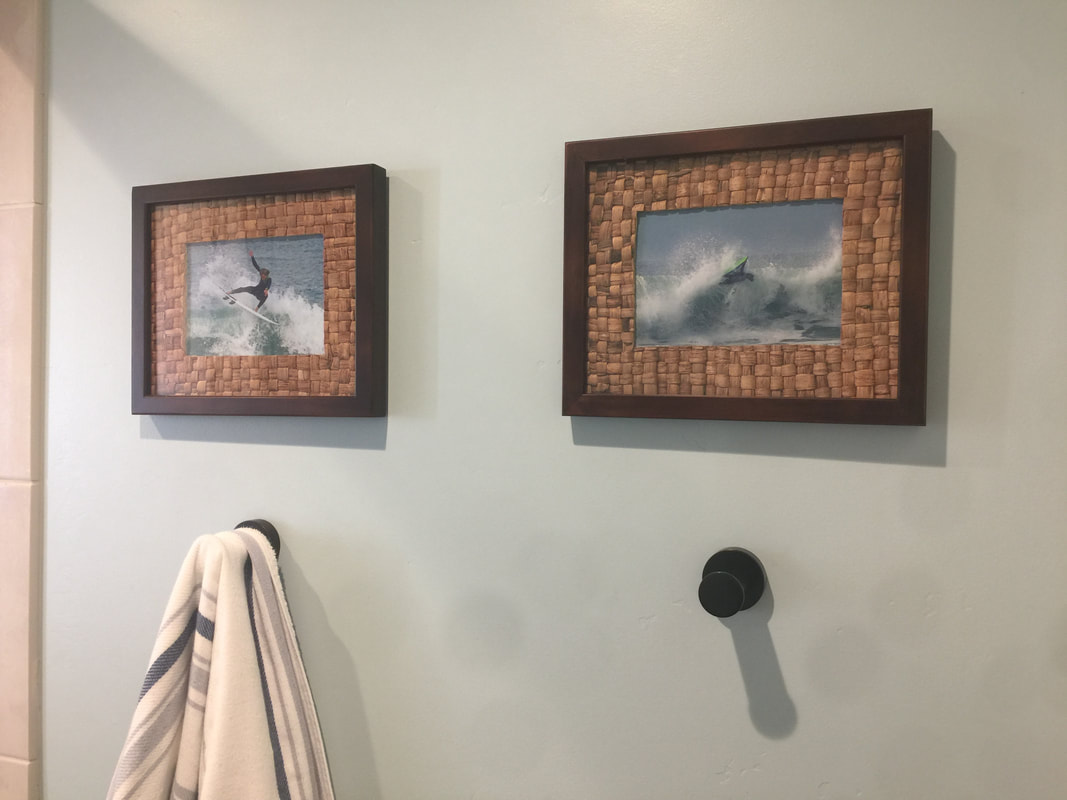 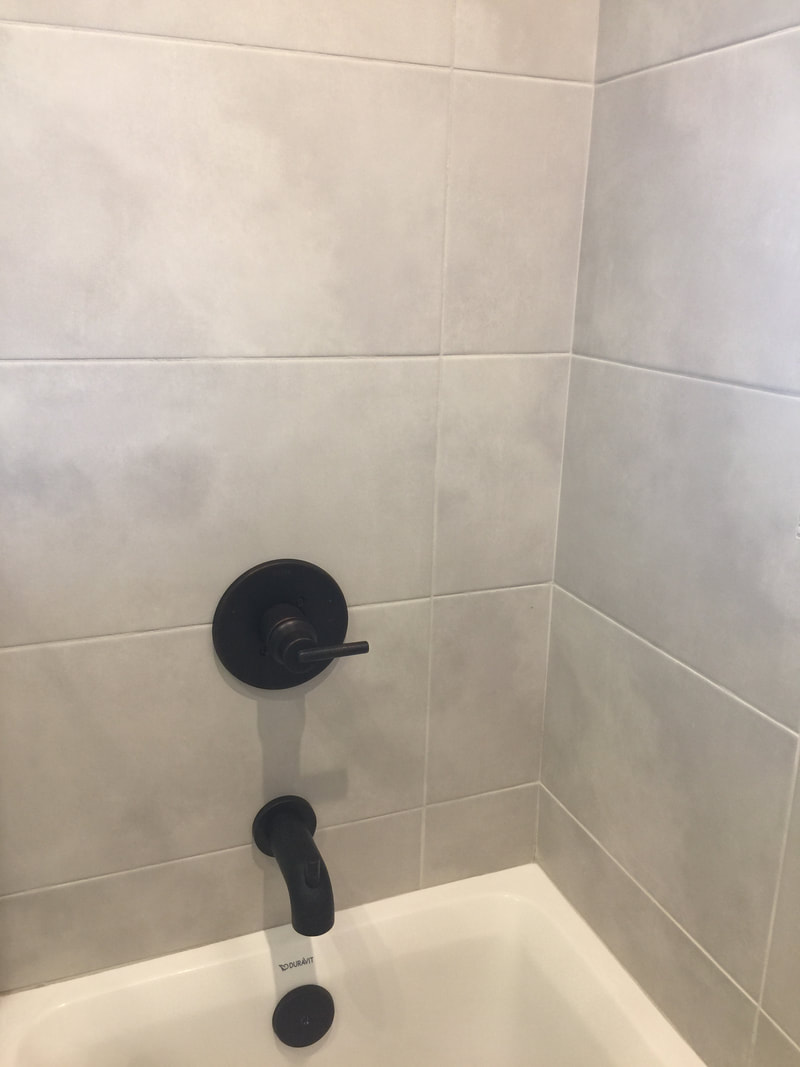 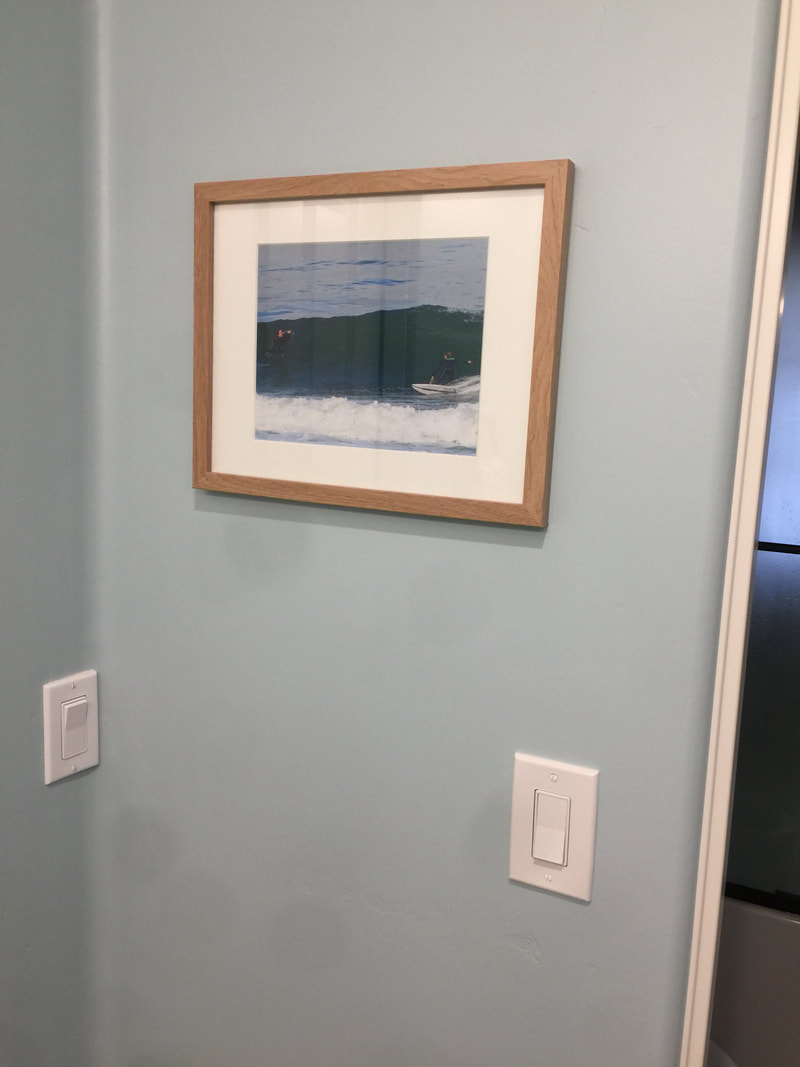 It's porch season hurray! I have had so much fun designing outdoor spaces this season. I hope there are more to come. As the weather warms everyone is gearing up for outdoor living. This front porch in lovely Setauket, New York was for one of my long-time clients. They are undergoing a major porch update and needed the decor and furniture to match. Since they spend a lot of time out front it needed to be very comfortable and an extension of the interior. We utilized their existing white wicker furniture and cushions that are still in great shape. I updated with new pillows, rugs and decor. It is ready for hanging out while sipping something icy and cold. Do you need help with your home projects? Decorator in a Box can help with that. Visit the website here and follow the four easy steps. It can all be done from the comfort of your home computer. I can't wait to hear about your project. Xo, Annie 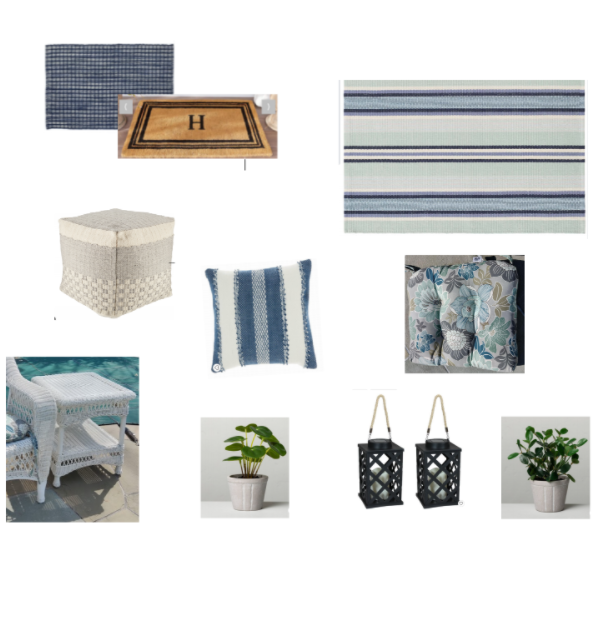 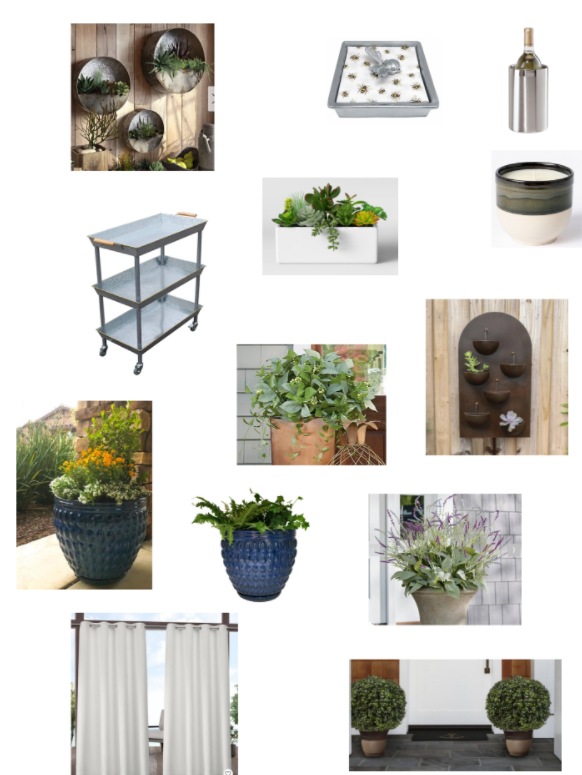  Do you ever empty a food container and wonder what you could use it for? That was the case with our empty oatmeal box. My girls decided a fairy house would be a great use for the box. We had recently watched "The Great Fairy Rescue" , an old favorite. The little girl Lizzy in the movie makes a fairy house out of an oatmeal box which Tinkerbell then discovers. We tried our best to make it look like Lizzy's while giving it our own fairy flare. Here is the quick and easy way to make your own. The best part is it got us outside for some sun and fresh air. First we peeled the paper off the container for a more natural look. Then we penciled and cut out the door and windows. The top cone roof was made with brown construction paper. Then we got out to the backyard to collect leaves, flowers and twigs to give it that fairy look. The best part was sitting together and glueing on the leaves and attaching the twigs. Now it needs some interior design. I'm thinking cotton ball pillows and a thimble table. If you make one please share your pictures with us. Xo, Annie  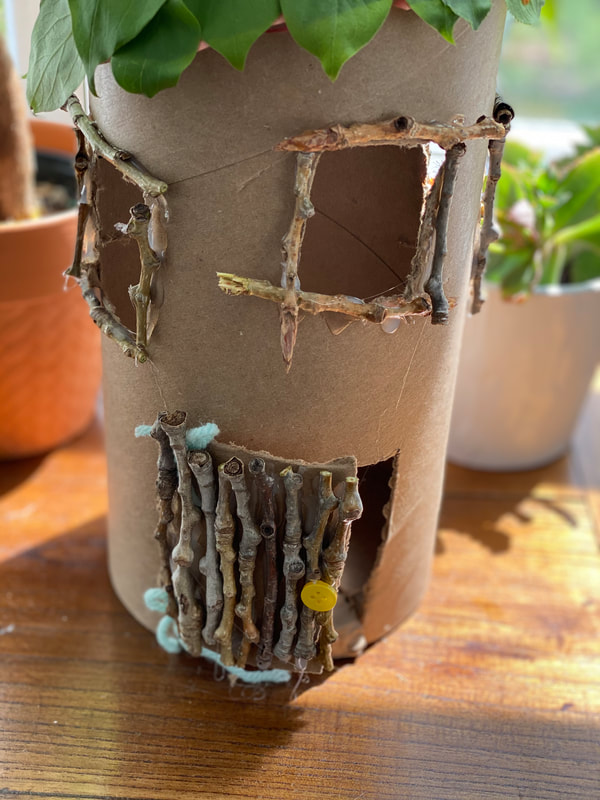   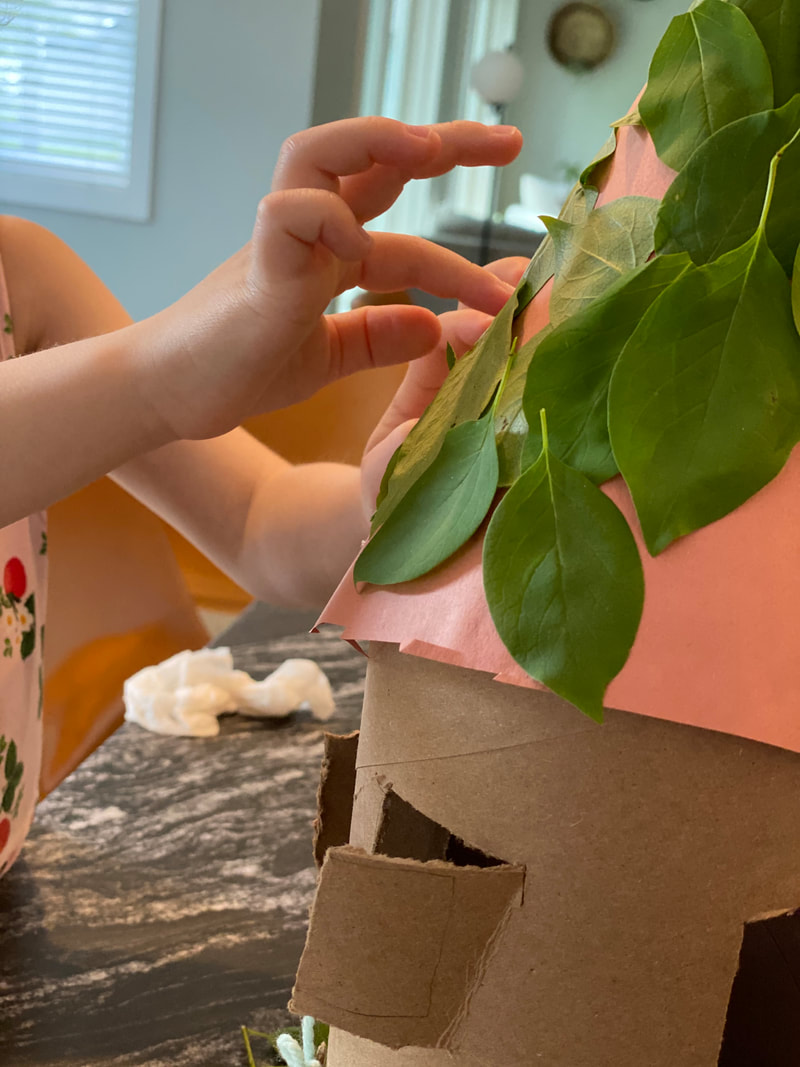 Banana Oatmeal Recipe - Make rolled oats according to the box. We use milk instead of water. - Mash one banana and mix in the oats. -Top with berries, cinnamon and a little syrup or brown sugar.  Happy Friday Friends! Today I bring you part two of my 1980's home remodel. Last week I shared a wall of our main level remodel. Today I bring you our family room. This wall was the first remodel project we tackled in this home. It was such a focal point in the room. We knew it would feel like a major update. The before photo is the listing photo. Therefore the furniture is not ours it's from the stagers. You can see in the before photo we removed the bookcases, updated the fireplace, removed the popcorn ceiling, removed track light and replaced the carpet with wood flooring. We also updated the baseboards, window casing and painted the walls a light gray. I have dreams of updating this fireplace to gas in the future. Another change to come is the sliding doors will become windows. We added a deck off of our kitchen and do not have plans to add a deck here. We are so happy with everything so far. The interior designer in me always has more plans for this space. It's a double edge sword being a designer in your own home. I notice everything and am constantly making changes in my mind. Do you have a home project you need help with? I can create a custom online interior design for you. Each Decorator in a Box is custom designed to meet your personal style and budget. I will work with items you already have or we can start fresh. The best part is this design process is all done from the comfort of your home computer. Leave your slippers on and email me a few photos with thoughts about your space. That will get the ball rolling to start your design. All designs are mailed and emailed directly to you. I'm available for questions throughout the process. Included in each design is a furniture plan, vision board and detailed shopping list. The shopping list provides you with all the details to shop on your own at your own pace. Start your custom design today by clicking here. I can't wait to hear about your project! Xo, Annie After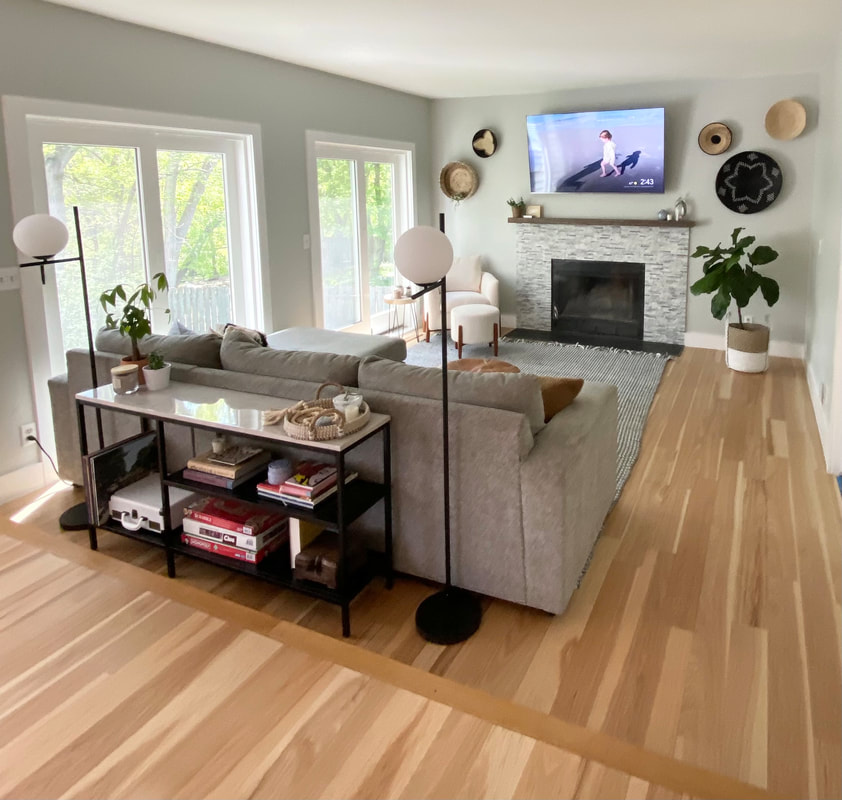 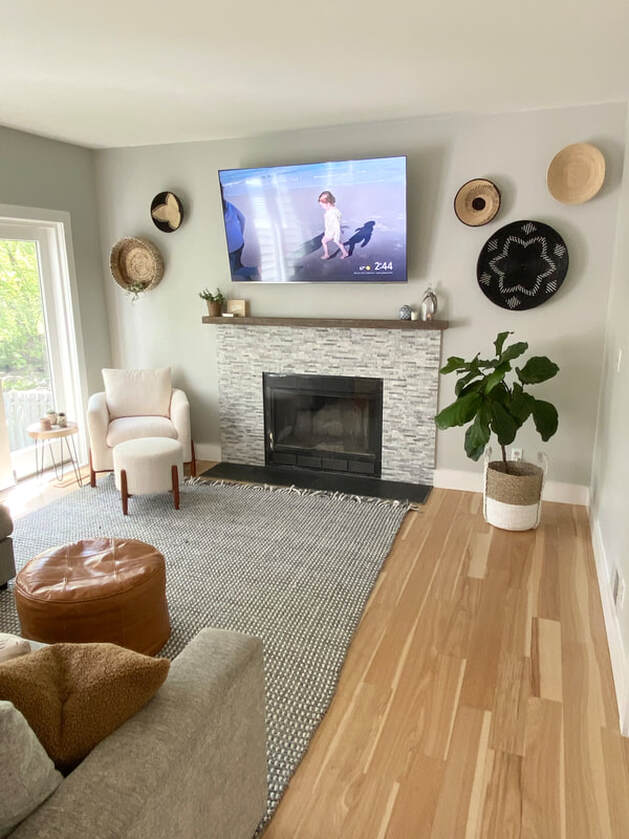 Before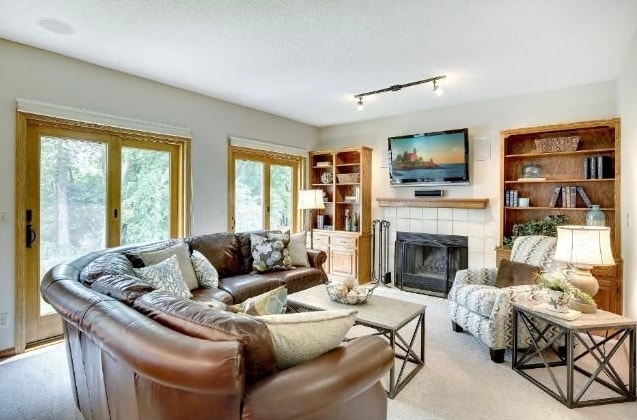 After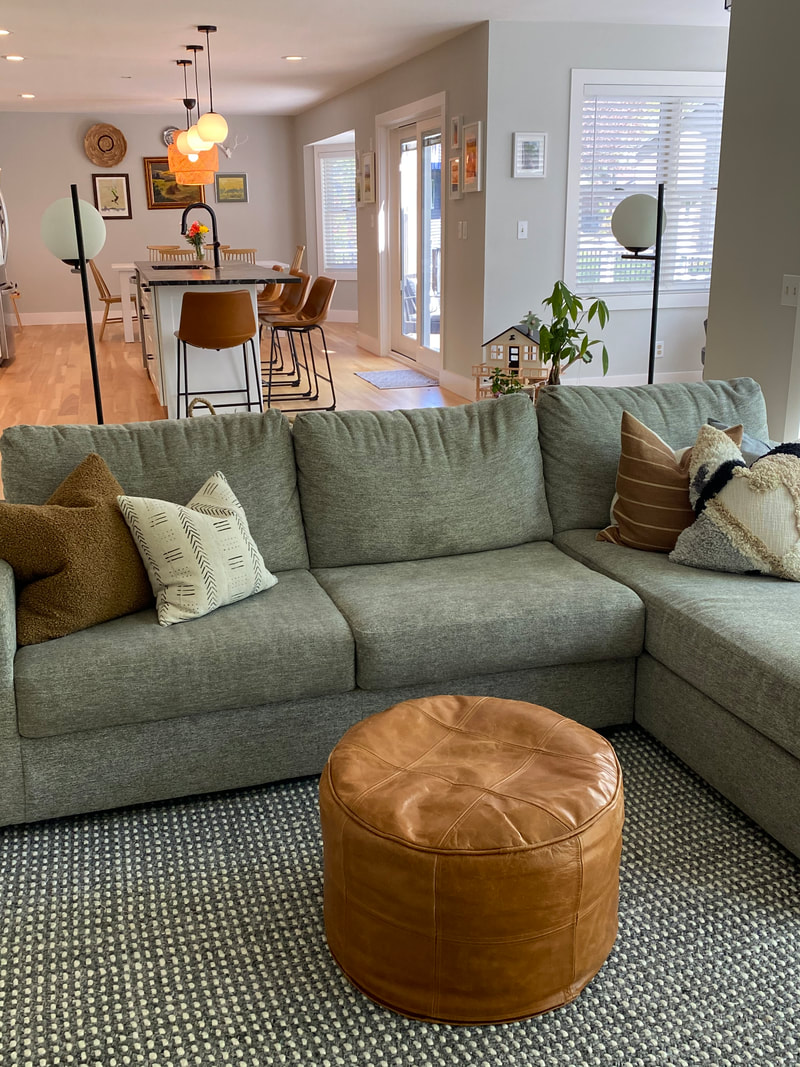 The Details Happy Tuesday! I'm excited to give you a sneak peek at this sporty nostalgic basement design in Fargo, North Dakota. Oftentimes basements are an afterthought in a home. Yet they get a lot of use so it really shouldn't be that way. That's why it was fun to give this basement a thoughtful design. The idea was to make it a fun place for the kids and teens to hang out. Yet a spot for the adults to entertain. This family loves sports, history, films and classic books. Therefore, we wanted to incorporate that vibe in a sophisticated way. I blended tufted leathers, black accents, vintage art and accessories to create an upscale nostalgic sport lounge. Also off of the living and kitchen area is the office and movie theater. It was important to have the theater and office flow nicely with the main area. All and all this space is ready to shoot some pool and swivel in a chair for gaming. Don't forget to pop the popcorn for an epic movie night. Here is a look at the vision board and furniture plan. The shopping details are saved for the client. Tell me about your home project. Visit the Decorator in a Box website to begin your online interior design in four easy steps. I will email and mail you a design complete with a detailed shopping list, furniture plan and vision boards. Everything to begin shopping on your own at your own pace. The best part is this can all be done from the comfort of your home computer. Please contact me for any questions. I look forward to hearing about your project. Start your design by clicking here. Xo, Annie 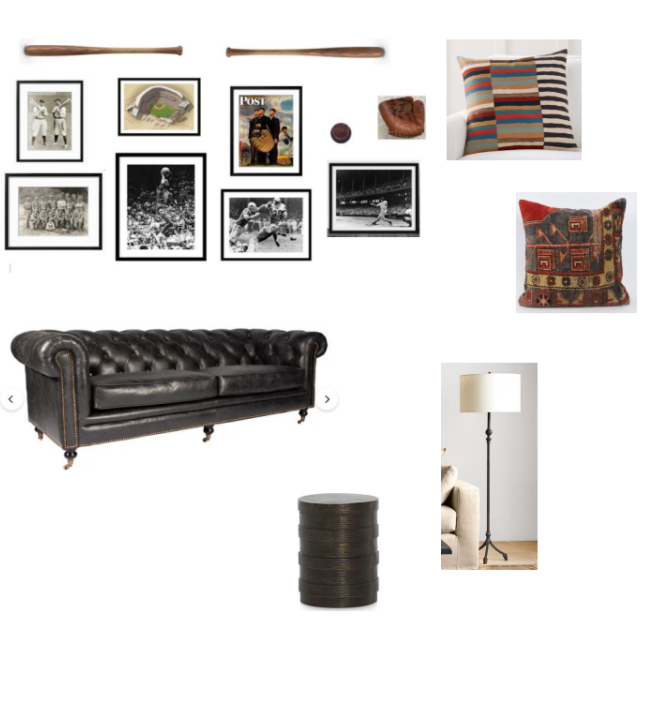 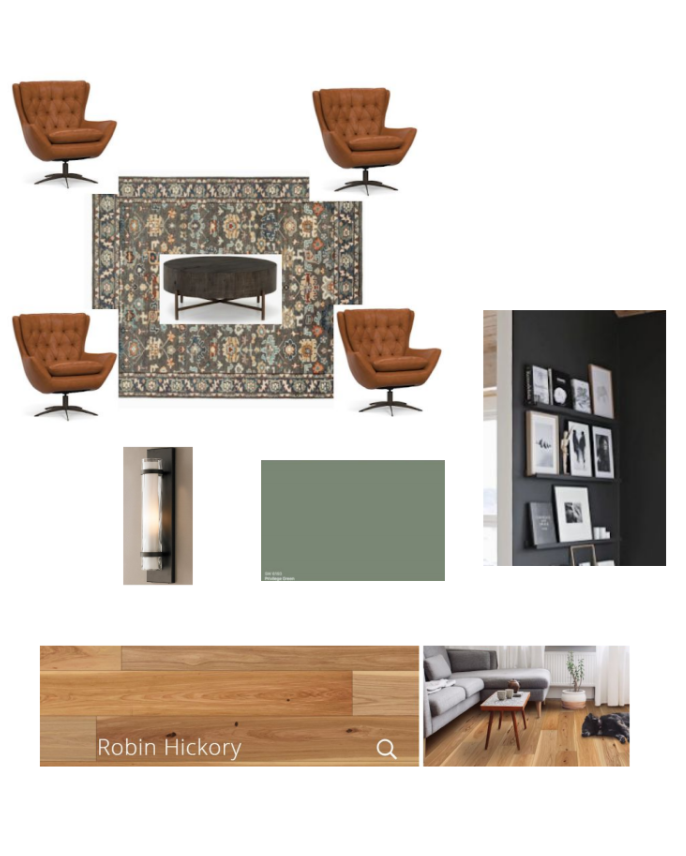 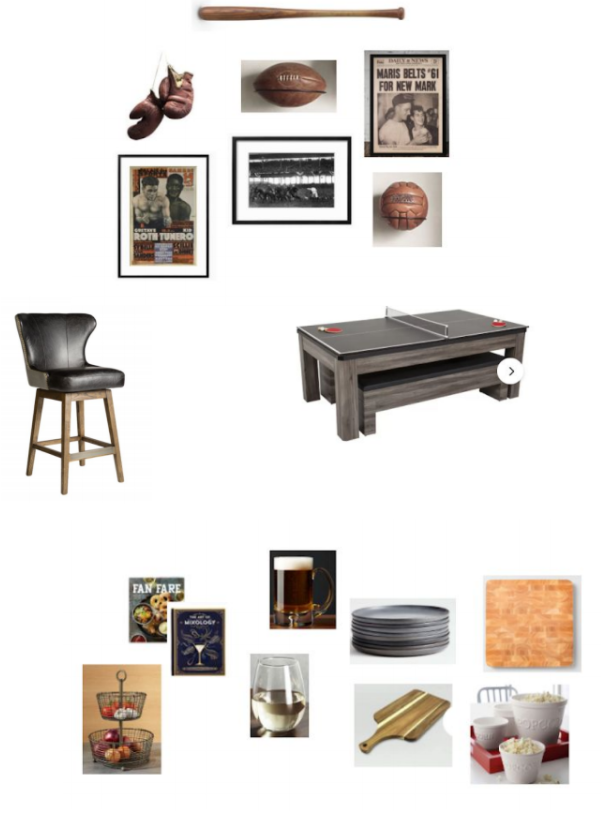 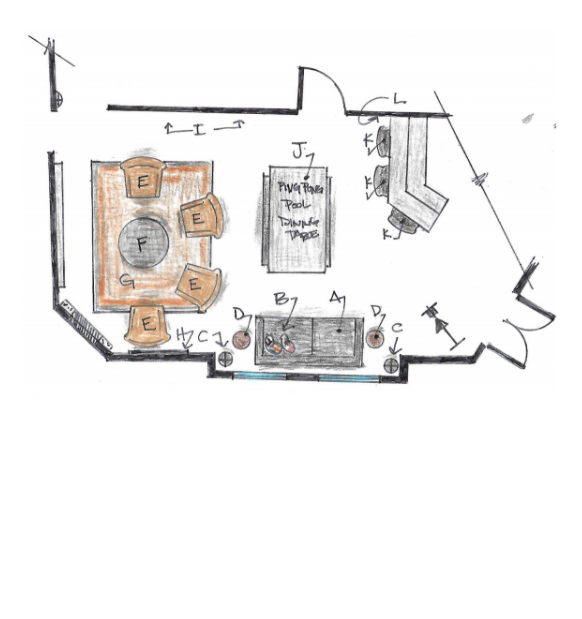 Office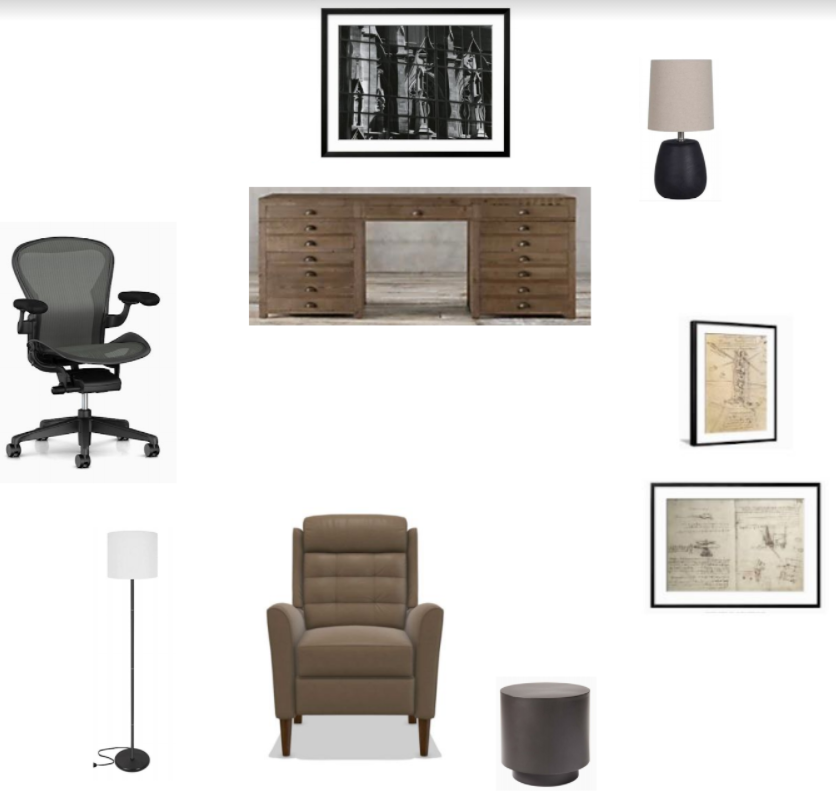 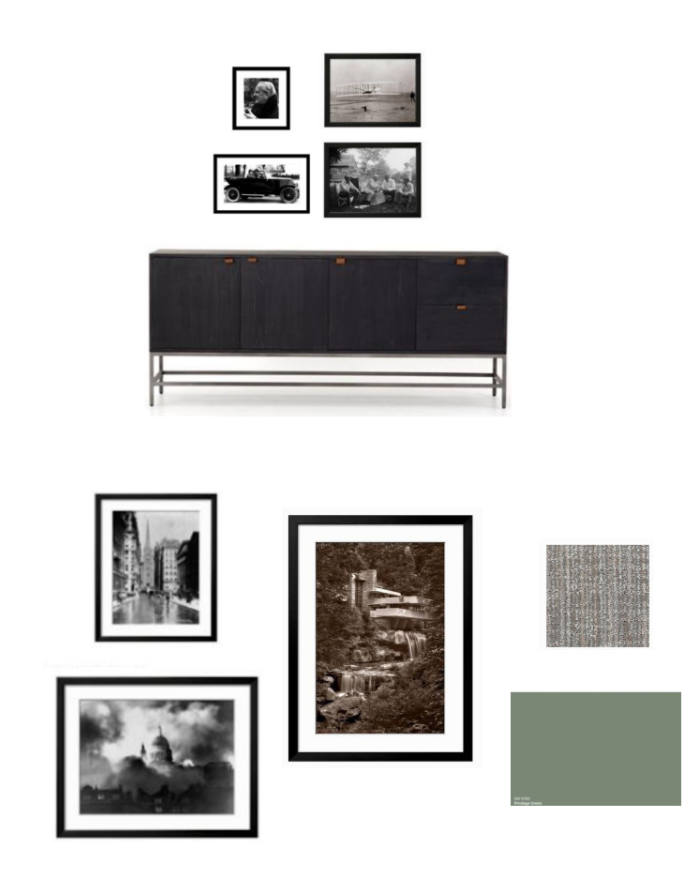 Theater 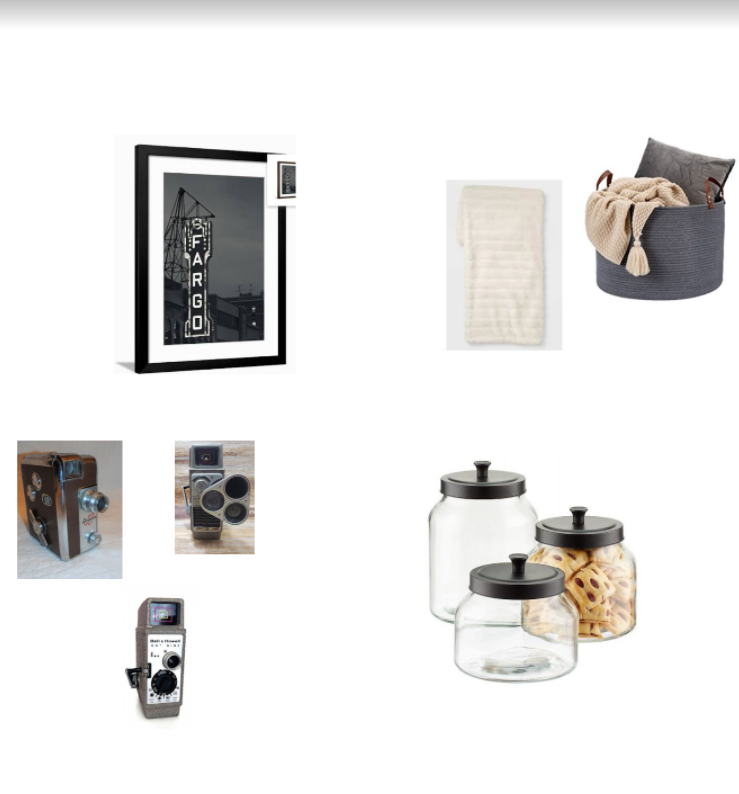 Happy Friday all! I hope you had a great week. I had such a great time designing this bathroom and laundry remodel in the lovely coastal town of Clinton, Washington. I have had the pleasure of working with this client over the years. Return clients warm my heart. Even though we worked at a distance I still feel like I know them well. Here is a little glimpse at the furniture plan and vision board. All the specific shopping details are saved for the client. The bathroom vision board has since evolved a slightly different direction than these initial boards. We started with green tile and veered toward a cleaner white subway tile look. However I thought it would be fun to show you the initial green tile. The mission was to make the most of a small space. We tried to get a tub inside the shower and in the end realized things were just too tight. These are the reasons it helps to have a designer. You can see what will and will not work. It's all a process and oftentimes your initial vision for the space is not always where you land. Tell me about your home project. Are you feeling stuck on what to do with a fireplace mantel? Maybe your sofa pillows need a little refresh? Is the remodeling process overwhelming? Let Decorator in a Box take away some of those burdens. I will create a design at an affordable flat rate that meets your personal style and budget. The best part is this process is done from the comfort of your home computer. All designs are mailed and emailed directly to you. I'm available for questions throughout the process. Start your design in four easy steps by clicking here. Xo, Annie 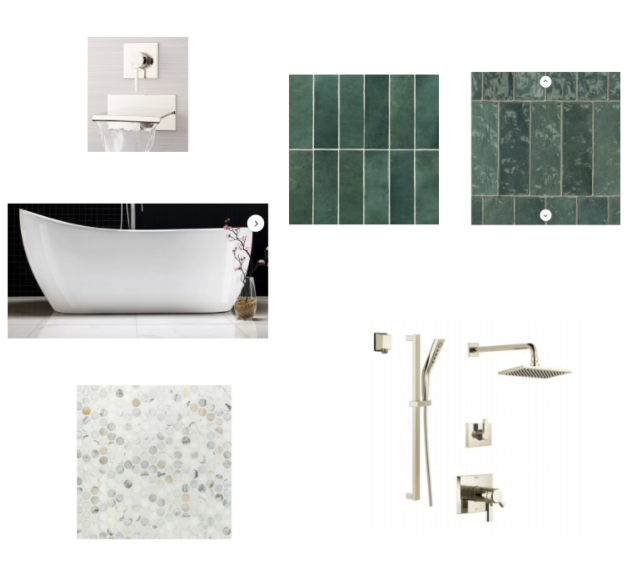 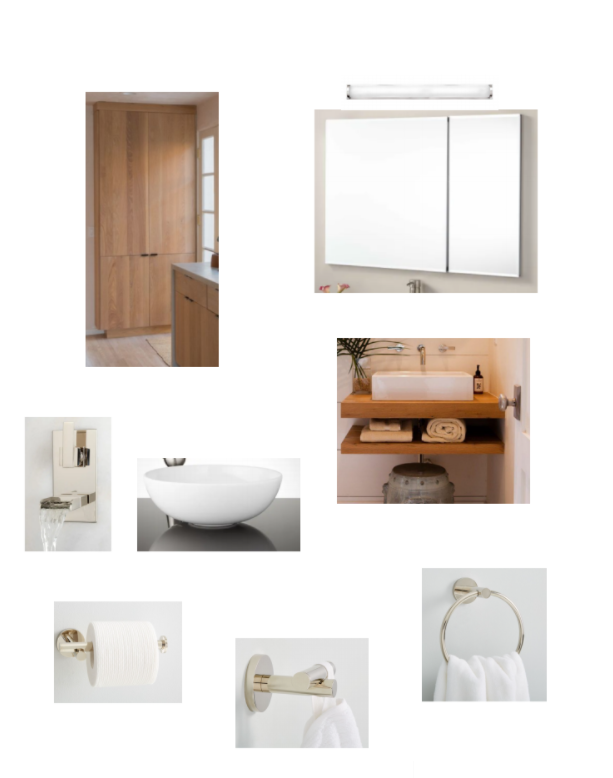 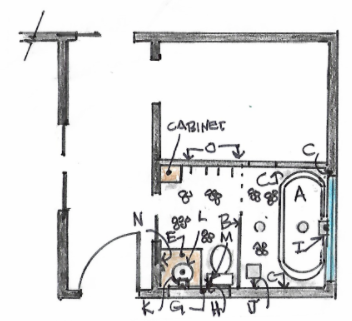  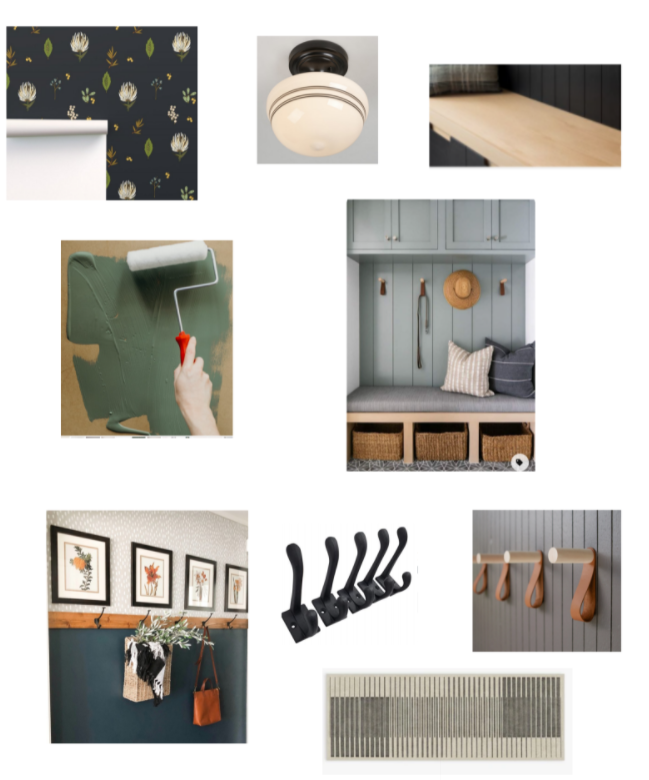 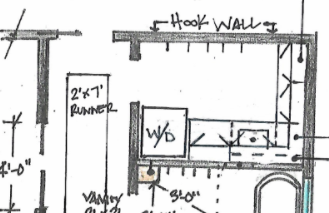 I'm finally getting around to showing you photos of our remodel! I'm embarrassed to admit we completed most of this two years ago. We are still putting the finishing touches on things. Mainly because we have been doing all the work ourselves. When I say "We" I mean my husband does all the work while I do the designing. Instead of doing one big reveal I'm going to give you just one wall here and there. Sometimes too many photos take away from how much of a transformation has really happened. Plus some of these walls we are still adding finishing touches to here and there. These things take time and like any DIY project you gain and lose steam at various times. We purchased this 1980's home about 6 years ago in Minnesota. It was filled with all the glorious honey oak. Not the lovely white oak I keep putting in designs today, but you know the yellowed dingy 80's kind. We still have a lot of that in the upstairs and basement. Our main focus was getting the kitchen and main level up to a more 2020's style and removing the 1980's. As much as I love many things from the 80's it's not my favorite era of home design. The before photos are from the listing. Therefore the furniture you see was not ours, but most likely from the stagers. In the photos you will see we removed the dining room wall to open it up to the kitchen. We took the sink wall and added a sliding door that leads out to our new deck. The deck and the large island are my favorite updates. We added all new hickory wood floors for a Scandinavian modern look. We also replaced the ceiling with new and smooth drywall. Goodbye popcorn ceilings! All and all we are so happy with the result. It's great for big family gatherings when we get to do that kind of thing once again. Do you need help with your home project? Tell me all about it. I will create a custom Decorator in a Box to meet your personal style and budget. This can all be done from the comfort of your home computer in four easy steps. The design is an affordable flat rate that is mailed and emailed to your home. You can start your design without even changing out of your stretchy pants and slippers. I can't wait to hear about your project. Start your design today by clicking here. Xo, Annie After Before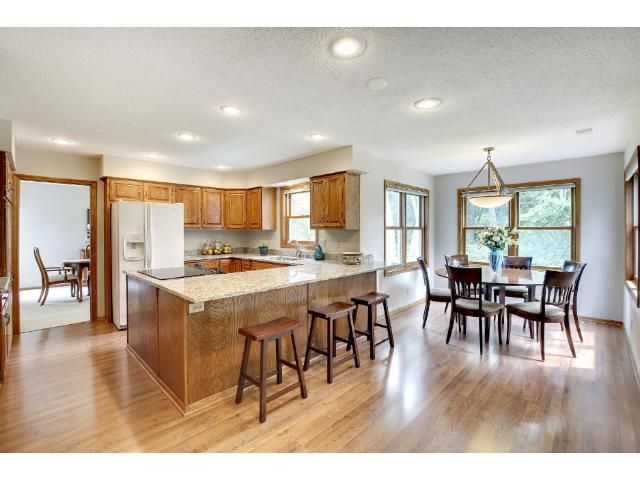 After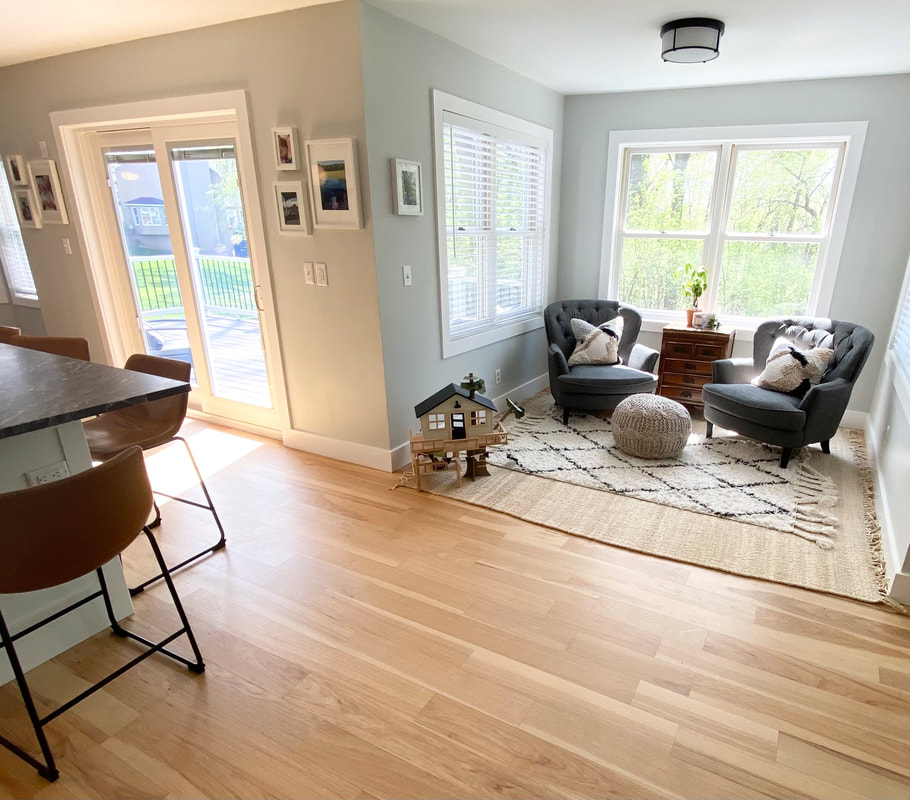 Before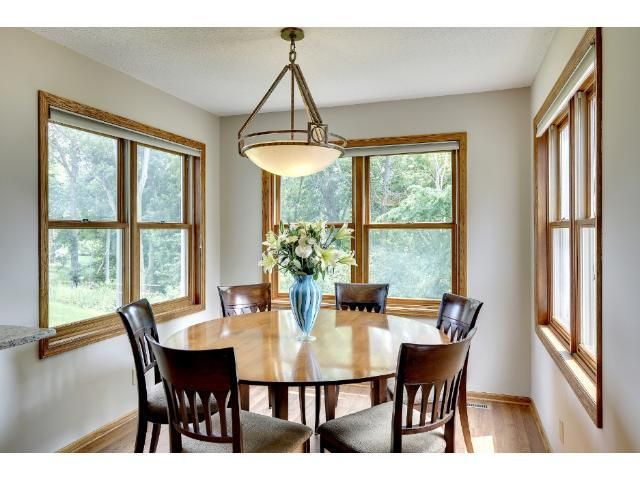 After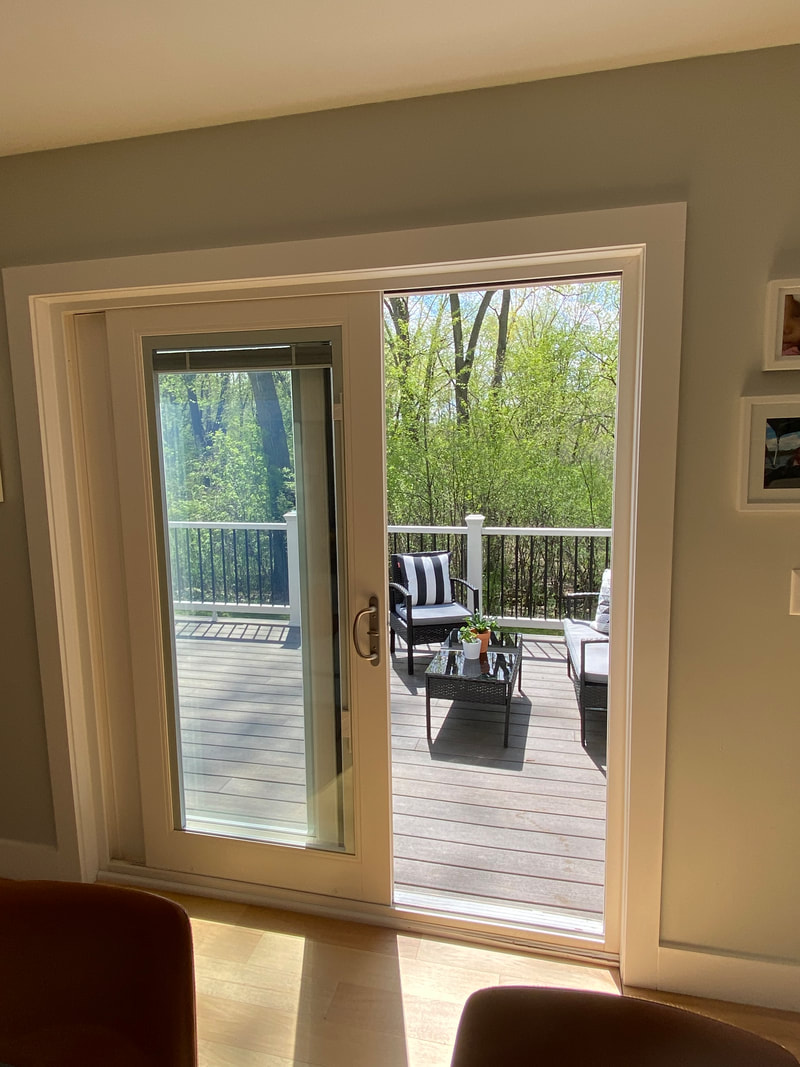 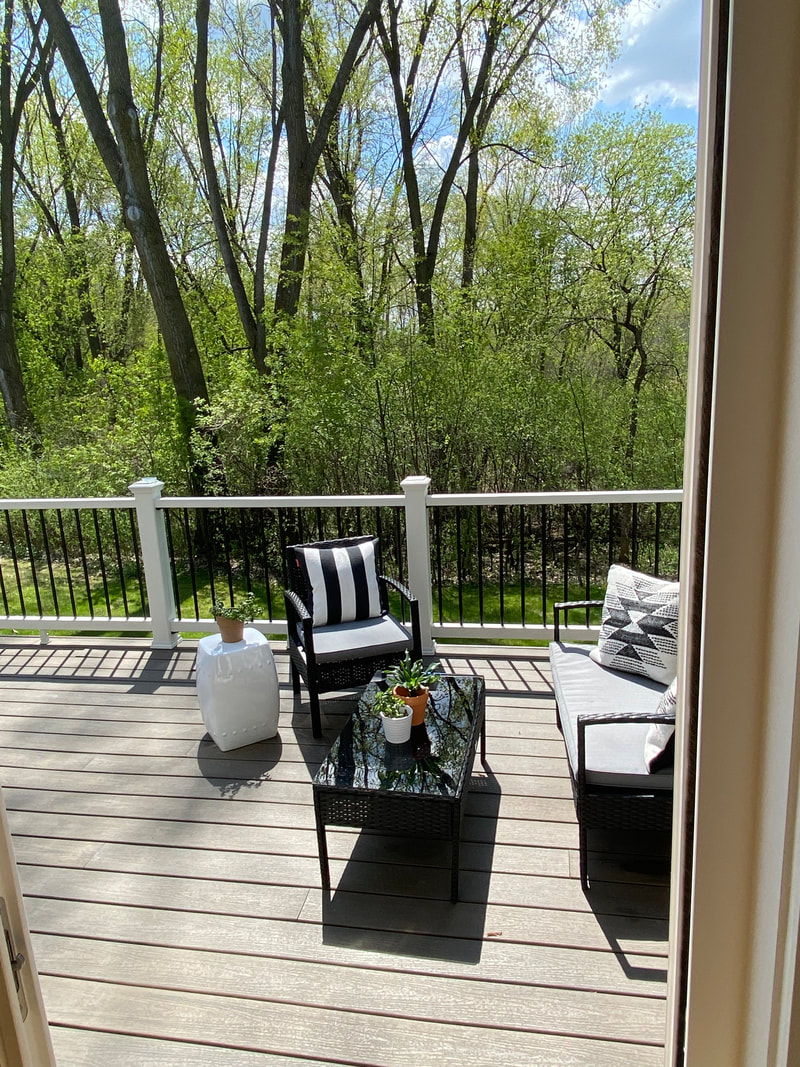 Before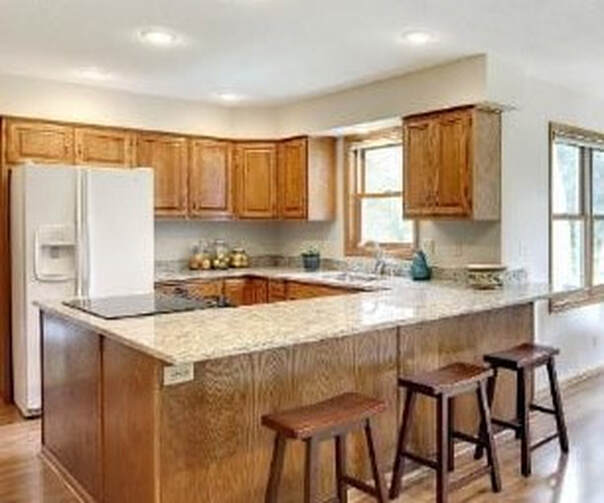 After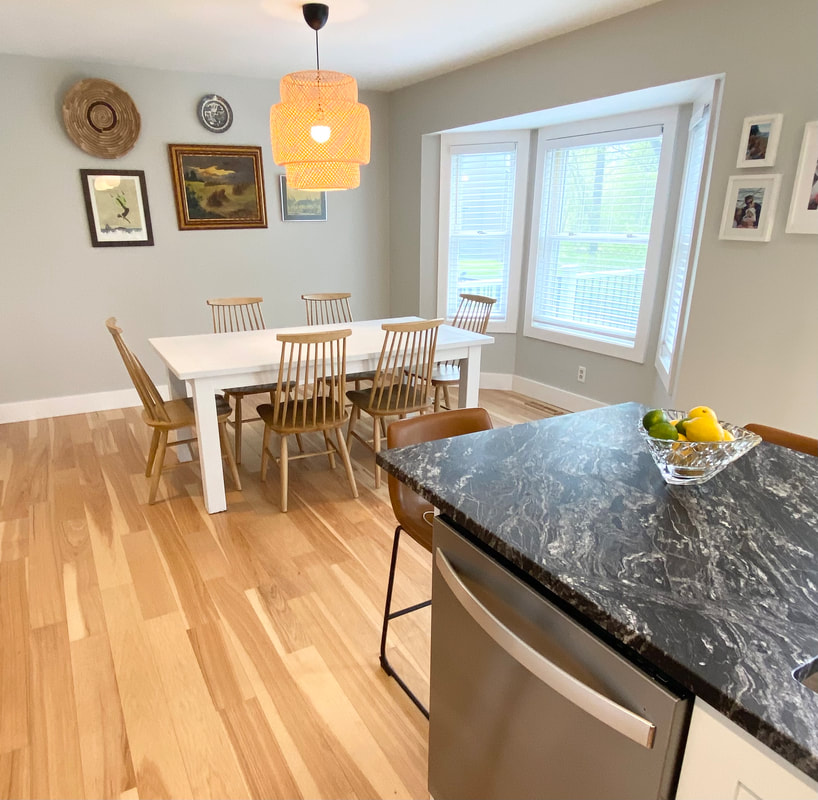 Before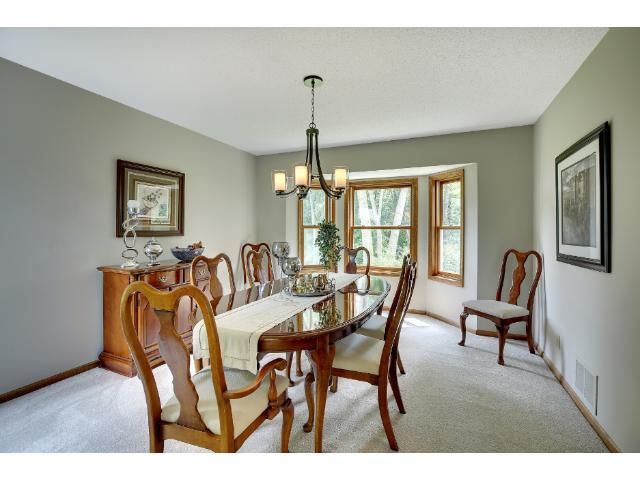 |


 RSS Feed
decorator in a box
With Annie Pauza's guidance, you can affordably transform your space into a place that reflects your style and personality. As an online interior decorating service, Decorator in a Box lets you maintain control through the do-some-of-it-for-me process, and gives you everything that you need to bring an expert aesthetic to your home.
|
|